重新安裝ssh server#
1
2
3
| sudo apt-get remove openssh-server
sudo reboot
sudo apt-get install openssh-server
|
ssh允許使用root登入#
1
2
| sudo vim /etc/ssh/sshd_config
# change "PermitRootLogin no" to "PermitRootLogin yes"
|
ssh免密碼登入#
建立ssh rsa key
 1
 2
 3
 4
 5
 6
 7
 8
 9
10
11
12
13
14
15
16
17
18
19
20
21
22
23
| [[email protected] ~]$ ssh-keygen -t rsa
Generating public/private rsa key pair.
Enter file in which to save the key (/home/neil/.ssh/id_rsa): [Press enter key]
Created directory '/home/neil/.ssh'.
Enter passphrase (empty for no passphrase): [Press enter key]
Enter same passphrase again: [Press enter key]
Your identification has been saved in /home/neil/.ssh/id_rsa.
Your public key has been saved in /home/neil/.ssh/id_rsa.pub.
The key fingerprint is:
1f:ad:49:00:4a:d5:ab:99:b3:b0:f9:09:91:c4:ed:d2 [email protected]
The key's randomart image is:
+--[ RSA 2048]----+
| ..oooE.++|
| o. o.. |
| .. . |
| o . . o|
| S . . + |
| . . . o|
| . o o ..|
| + + |
| +. |
+-----------------+
|
Create .ssh Directory on host server
1
2
3
4
5
6
7
| [[email protected] ~]$ ssh [email protected] mkdir -p .ssh
The authenticity of host '192.168.50.6 (192.168.50.6)' can't be established.
RSA key fingerprint is 48:0e:28:11:d6:81:68:16:04:5f:db:49:02:la:12:4e.
Are you sure you want to continue connecting (yes/no)? yes
Warning: Permanently added '192.168.50.6' (ECDSA) to the list of known hosts.
[email protected]'s password: [Enter Your Password Here]
|
Copy public key to host server
重新啟動ssh服務
確認ssh服務狀況
防火牆設定允許ssh服務
1
2
3
| sudo ufw allow ssh
# or
sudo ufw allow 22
|
設定Python環境#
1. 使用Python3#
1
| sudo apt-get install python3-venv
|
建立Python3虛擬環境#
1
2
| # 在當前資料夾建立環境
python3 -m venv <venvName>
|
啟動環境
1
| source ./<venvName>/bin/activate
|
2. 使用Conda作為Python環境#
(Option)移除Python 3.6#
⚠️ 不要輕易移除,曾試過移除後GUI失效
1
| sudo apt-get remove python3.6
|
移除Python 3.4及其dependent
1
| sudo apt-get remove --auto-remove python3.6
|
清除Python 3.4
1
2
3
| sudo apt-get purge python3.4
# or
sudo apt-get purge --auto-remove python3.6
|
安裝 Conda for Python 3.7 64bit#
可以到Conda Docs頁面確認下載版本或使用下方範例(Python 3.7)
1
2
| cd ~/Download
wget https://repo.anaconda.com/miniconda/Miniconda3-latest-Linux-x86_64.sh
|

更改檔案權限
1
| sudo chmod +x ./Miniconda3-latest-Linux-x86_64.sh
|
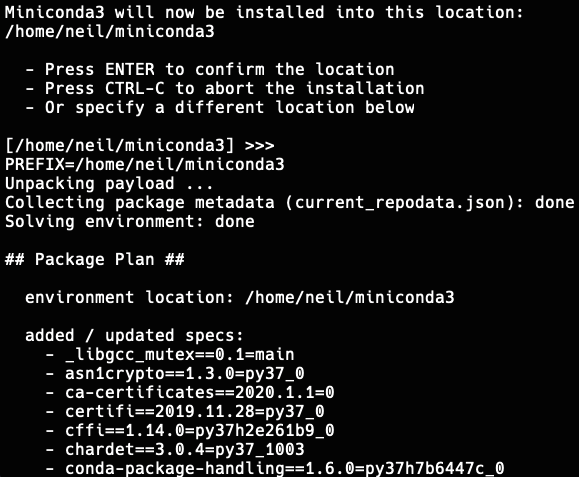
安裝
1
| ./Miniconda3-latest-Linux-x86_64.sh
|
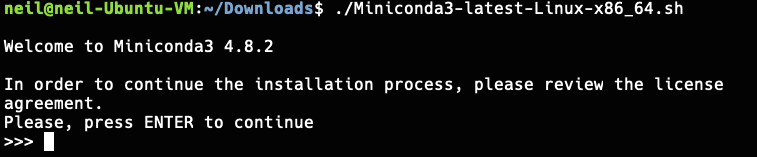
同意license terms

Hit Enter
Type “yes”
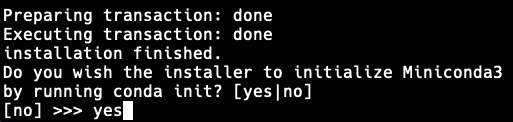
重啟Terminal、測試command

建立Conda venv(虛擬環境)#
確認安裝了多少個虛擬環境
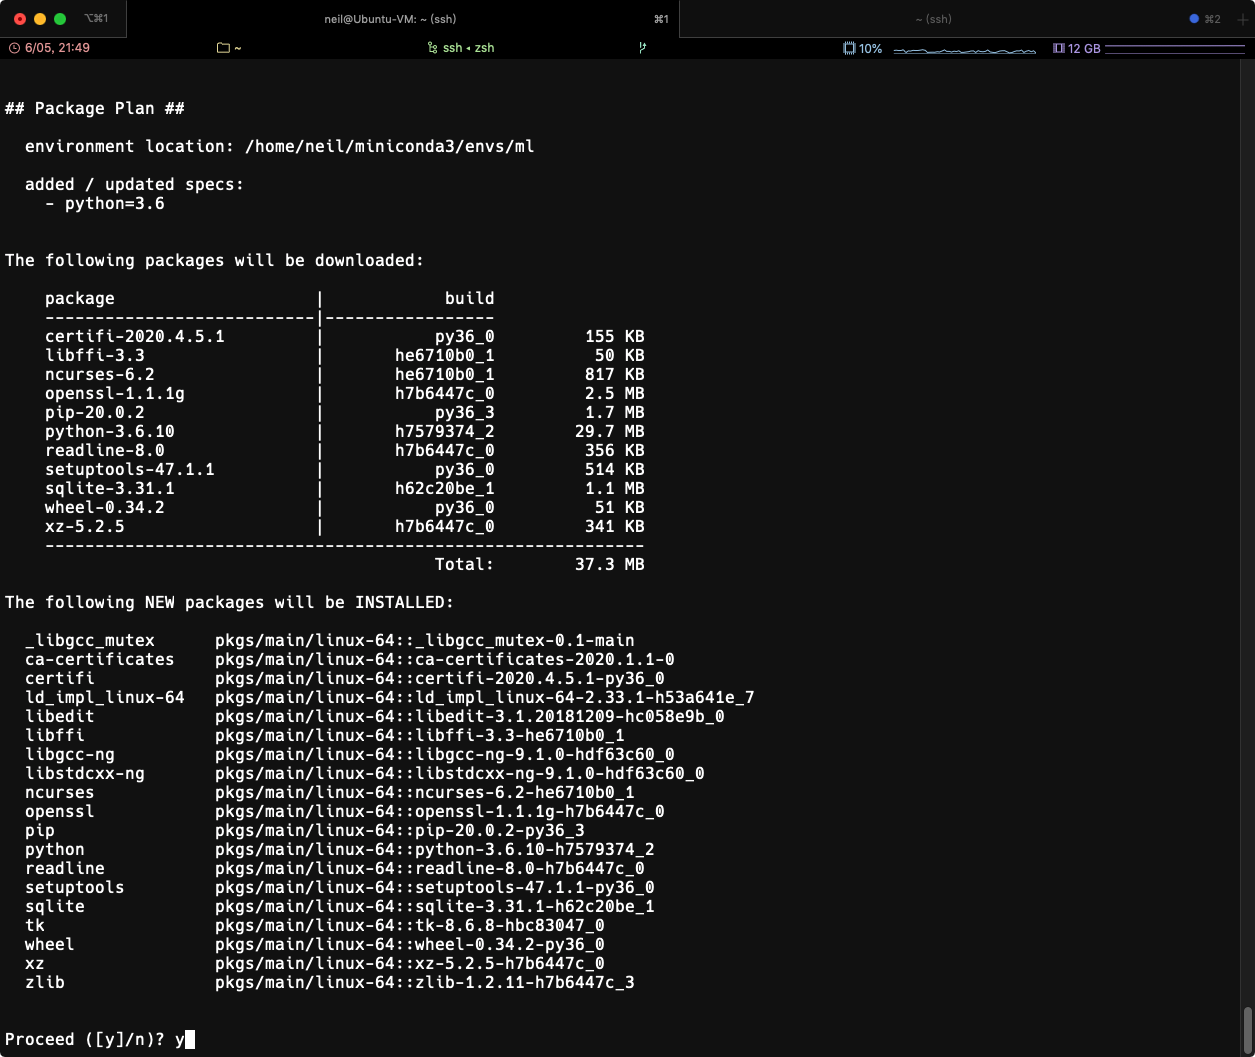
假設建一個名為 ml 的 venv 並設定Python 為3.6
1
| conda create --name ml python=3.6
|
Press y
1
2
3
4
| # To activate this environment, use
conda activate ml
# To deactivate an active environment, use
conda deactivate
|
刪除虛擬環境或package
1
| conda remove --name ml numpy
|
刪除虛擬環境
1
| conda env remove --name myenv
|
安裝 Machine Learning 相關環境#
安裝常用環境,可參考下方文章
 1
 2
 3
 4
 5
 6
 7
 8
 9
10
11
12
| pip install numpy
pip install pandas
pip install scikit-learn
pip install --upgrade tensorflow
pip install Keras
pip install Pillow
pip install tensorflow
pip install torch
.
.
.
etc.
|
⚠ 若在 import tensorflow as tf 時出現: Illegal instruction (core dumped)經確認是CPU缺少avx指令集的關係(CPU架構太舊不支援)。
可降低Tensorflow版本解決
1
2
3
| pip uninstall tensorflow
# and then
pip install tensorflow==1.4
|